


And I have basically been building our master bedroom around it. I'm not sure if that is "right" when decorating your home, but I vaguely remember them doing something like this back in the days of Trading Spaces, so I just went with it.
Last week I came across this totally awesome image...

And I thought, "Hey, how awesome would that be for a headboard?!" So off to Home Depot we went!
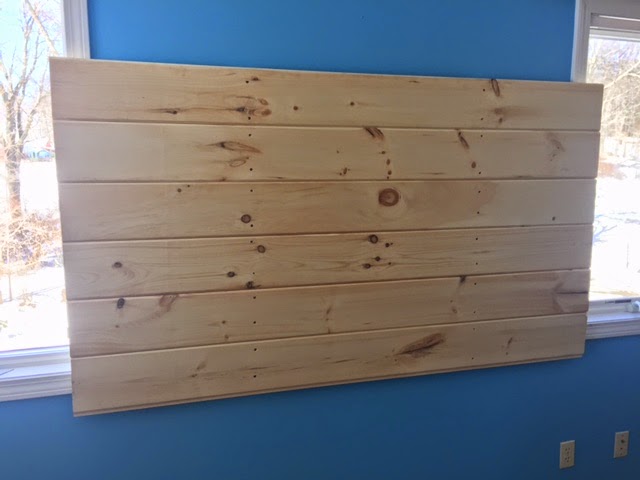
We picked up six 8" pine planks that measured 6' long, Minwax "Weathered Oak" stain, a pack of foam brushes, and some wood putty. I wanted to have the headboard mounted on the wall rather than connecting it to the the bed. Garrack drilled a couple of 2x4 pieces he had laying around into the wall to mount the headboard on.
Before I had him start putting up the planks we played around with the wood "patterns" until we got something we liked.

I was so happy that we went with the pine. I like the knots and cracks in the wood. I think it gives it so much more character. The planks we found were also cut in a manner that allows you to kind of layer them (I don't know what the proper term is for these types of planks). But after staining it made the headboard look like it was made of reclaimed barn wood (you'll see what I mean in just a second).
So once we had arrange the boards just right, Garrack got to work.


I let him do this stuff. He's an engineer and this sort of thing is just second nature to him. He can pump it out no problem. If it was left just to me, I would probably still be trying to figure out the math to insure everything fit the right way. So, yeah. I'm the creative mind, he does the hard labor, and then I finish things off with my artistry.
So once we got the boards up we just quickly sanded the rough edges of the screw holes, filled them with wood putty, and then sanded everything with a belt sander when the putty was dry.


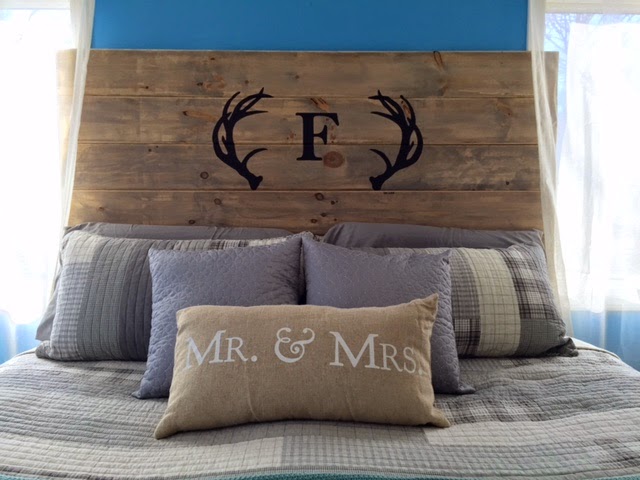
While Garrack sanded, I worked on getting things put together for my stencil. I wanted to do some deer antlers with our last initial in the middle. After Google searching for antler silhouettes I chose these:

Now, if you are a Mac user like me, you may not be able to print poster images (where you print the photo over several pages). I searched ALL OVER for instructions and found nothing useful. So I used a website I stumbled on called The Rasterbator. It will take any photo and convert it into a file to be printed out as a low quality poster. And it's FREE!
So once I had all my pages printed out I cut out the pieces and taped my antlers together.

By this time Garrack had finished sanding and the rest of the project was in my hands. So I put on some old clothes and got to work!

If you've never worked with stain before, don't worry, it is super easy. This was actually my first time working with stain. To be honest, I was worried I might "do it wrong". But I just went for it and soon realized that my fears were unnecessary. I mean, how much easier could it be? Brush it on, wipe it off, you are a staining Queen!

After I applied one coat I realized that if I put my stencil up there and tried to stain over it, I would have a major problem on my hands. So I turned to a technique I learned in USMC boot camp that I call "poor mans lamination". To keep photos from our families clean and safe from damage we would take clear packing tape and "laminate" them on the front and back. So I did the same with my stencils. It's as easy as taping the front, back, and then cutting away the extra tape.


So when the first coat of stain was dry, I pinned up my stencil to apply the second coat over it. But I soon realized two issues with my stencils. First, it was too thin to really make a noticeable "picture". Second, having the headboard already up on the wall caused the stain to run down and made it hard to avoid bleeding under the stencil. So I moved onto plan B and applied a full second coat of stain.
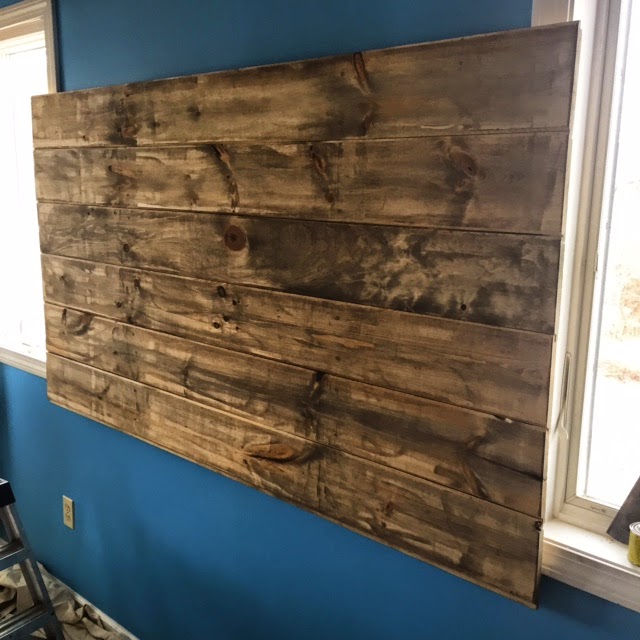
I was happy with the look of two coats so I moved forward with my backup plan and TRACED my stencil.

I took a trip over to Michael's and bought some Folkart Acrylic Paint in "Pure Black" and a pack of Craft Smart filbert brushes golden taklon.

And I got to painting! I started out with a rough outlining and filling in of the trace, and then went back and cleaned it up.


And the final product...

I am so in LOVE with this headboard!

The biggest thing to remember is that it isn't going to be perfect. And that is ok. I actually LIKE that my antlers aren't exactly straight. It shows that I made this and I did it by hand and that it is MINE. Perfection isn't all it is cracked up to be.

So even though my finished product isn't what I started out wanting, I am so glad that this is how things turned out. I think it looks even better then if I had stained over the stencils.
And now, I have the DIY bug. Expect more how-to's like this in the future. (YEAH!)
This is AWESOME and seriously so gorgeous!! I really want to sale or move our current bed frame and make our own headboard. We may be moving in the next few months, so I'm pinning this to come back to; I want to do this!
ReplyDeleteHow creative!!! This looks amazing!! Congrats on building this!
ReplyDeleteThis is beautiful! I love this idea so much. And you are one talented lady to be able to paint in the lines so well. I tend to have a shaky hand when painting. This is gorgeous!
ReplyDeleteIt has taken me a LOT of practice. I was all up in this headboard to be sure my lines weren't too crazy. However, that is the beauty of painting antlers! They don't have to be straight to look good (because naturally they are not).
DeleteGreat job! It looks fantastic. I love it!
ReplyDeleteAmazing job! The headboard looks really cool and very unique! Looks like you spent a lot of mullah on it too!!! It is so fun to do DIY at home! Creates such a warm and cozy environment! Awesome job, thanks for the creative idea!
ReplyDeleteI love what you did! So simple, but so beautiful! Very well done! I also love your Mr. & Mrs. pillow, super cute. I always get jealous of other people's master bedrooms because our is always where all the house leftovers go to die.
ReplyDeleteLOL! Aw. Poor dying things.
DeleteThat turned out amazing!! I love home made things with their little imperfections, makes them so much more special! Although if I looked at that headboard I would swear it was made by a professional because it looks perfect to me!
ReplyDeleteAll these blogs make me want to get my craft/redecorate on!!
Also I want TLC to bring back trading spaces! Lol
I really miss Trading Spaces! We should start a petition or start a hashtag or something.
Delete